What “professional” remediation actually means
Our team at Seattle Water Damage Restoration sees a lot of confused homeowners when evaluating the mold remediation process.
The term gets thrown around loosely by companies offering quick fixes with a spray bottle of bleach. True remediation goes much deeper than simply wiping down a visible stain.
We rely strictly on the IICRC S520 Standard for Professional Mold Remediation to protect your home and health.
This protocol is so well-regarded that the 2026 National Defense Authorization Act mandated its use for all U.S. military housing.
Knowing these specific steps empowers you to hire the right contractor and avoid cheap shortcuts. We will break down exactly what this rigorous standard looks like in practice.
Let’s explore the science behind the strategy. You will learn the exact methods required for a safe recovery.
The S520 process, in order
We follow a highly structured iicrc s520 process to prevent cross-contamination. The entire protocol relies on taking the right steps in the exact right order. Skipping ahead is a fast way to spread spores into clean rooms.
Our experience shows that proper sequencing is the difference between a successful $2,500 mitigation and a botched job that ends up costing $10,000 to fix.
Step 1: Inspection and assessment
An initial step is to send an AMRT-certified inspector to evaluate the affected area. A thorough inspection aims to identify the specific moisture source driving the fungal growth.
We use thermal imaging cameras to look for hidden problems behind drywall or inside HVAC systems. Fungal infestations are categorized by size. These categories range from Level 1 small issues to Level 4 severe structural damage.
Our team might also recommend surface testing or air sampling to identify the exact species present. A detailed output is a comprehensive scope of work matched to the actual conditions inside the house.
A professional never writes an estimate based solely on cell phone photos. We focus on the following key assessment targets during a visit.
- Visible colony identification
- Hidden moisture tracking with FLIR thermal imaging
- Level 1 to Level 4 scope determination
- Lab-based species analysis when warranted
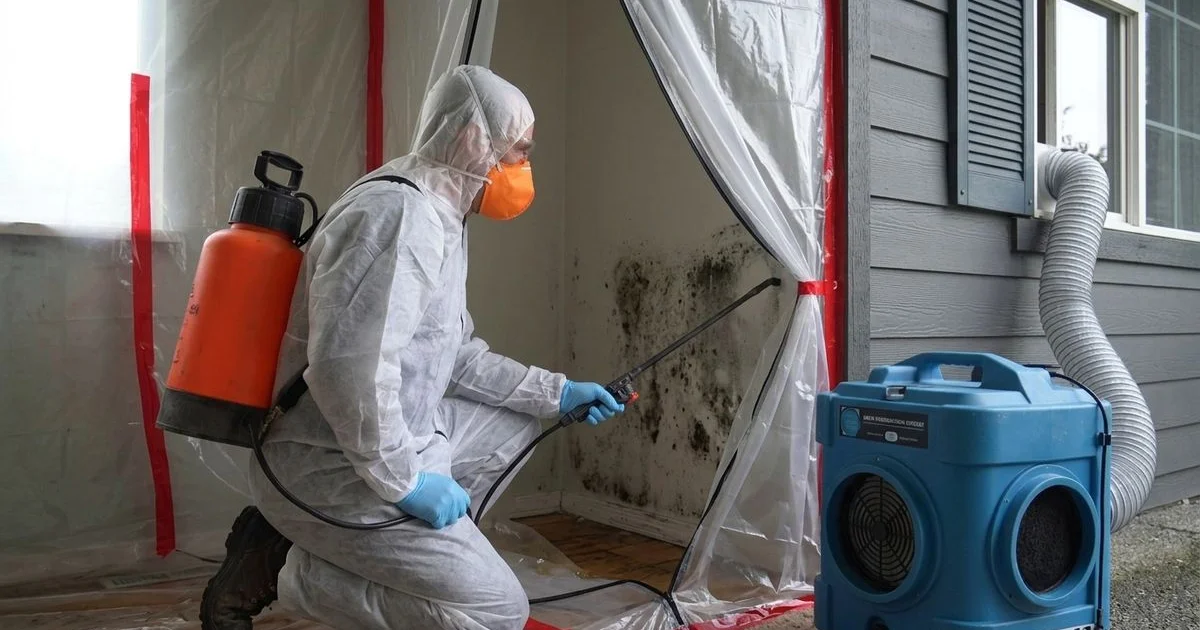
Step 2: Containment
Containment is the most critical phase of the whole operation. This vital barrier prevents cross-contamination of clean rooms.
We prioritize building these enclosures using heavy-duty 6-mil polyethylene sheeting to stop the spread of microscopic spores. Removing established colonies without setting up a barrier essentially guarantees a whole-house contamination event. The setup varies depending on the severity of the damage.
Our crews might only need a simple poly barrier over the door and sealed seams for a small bathroom. Large or high-risk projects require ZipWall dust barriers and two-stage decontamination chambers. This full containment strategy is non-negotiable for significant infestations.
| Containment Type | Best Used For | Key Components |
|---|---|---|
| Limited | Level 1 & 2 (Under 30 sq. ft.) | 6-mil poly sheeting, sealed door seams |
| Full | Level 3 & 4 (Over 30 sq. ft., Structural) | ZipWall barriers, two-stage decon chamber |
We leave the barrier completely sealed until clearance testing confirms the air is clean.
Step 3: Air filtration
Commercial-grade negative air machines run continuously inside the sealed zone. These powerful HEPA scrubbers create a distinct pressure differential. We run equipment calculations to ensure the room achieves four to six air changes per hour.
Lower air pressure inside the work zone ensures any airborne particles stay safely trapped. High-efficiency particulate air filters capture microscopic spores down to 0.3 microns.
We keep this intensive filtration running non-stop throughout the removal and drying phases.
Heavy machinery like the Novatek Novair 2000-BIO is standard for these applications. Continuous operation is mandatory for a successful cleanup.
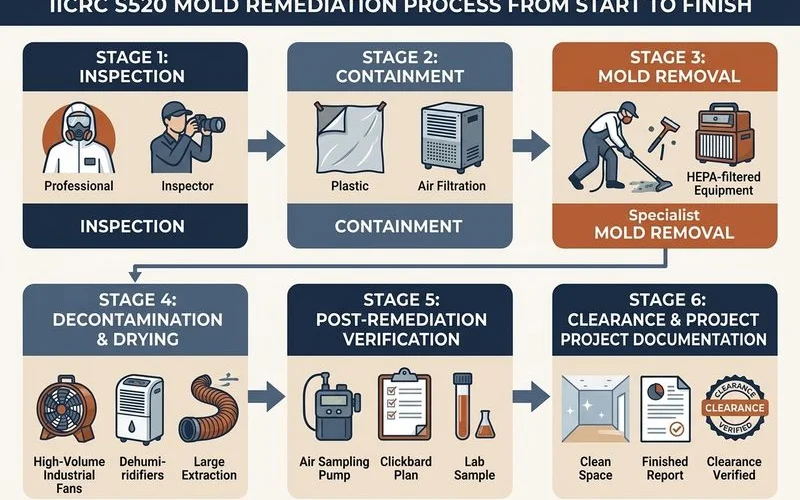
Step 4: Removal
We physically remove affected building materials that cannot be salvaged. The IICRC standard strictly categorizes how different materials must be handled.
Porous items with embedded growth are always discarded. Our list of discarded items typically includes carpet pads and drywall paper.
Semi-porous and non-porous structural elements can often be saved through aggressive cleaning.
Wood framing and sealed metal surfaces usually fall into this salvageable category. We dispose of extremely contaminated materials according to strict Environmental Protection Agency regulations. All discarded debris gets sealed in heavy-duty plastic contractor bags directly at the source.
Bagging the trash inside the dirty room prevents spores from falling off during transport. Our teams know that attempting to carry unbagged drywall through a clean living room is a classic amateur mistake that immediately cross-contaminates the house.
Step 5: Cleaning and antimicrobial
The bags are carefully carried out through the designated containment exit. Semi-porous surfaces like wall studs require specialized attention to remove deep-rooted fungi. We aggressively clean the structural elements that remain in place after demolition.
The process requires multiple distinct treatments. Professional teams do not rely on bleach for this stage. Our crews follow a strict sequential cleaning method.
- Thorough HEPA vacuuming to pull up loose surface spores
- Damp wiping the wood with detergent to break down organic biofilm residue
- Applying an EPA-registered botanical disinfectant like Fiberlock ShockWave
- Utilizing abrasive techniques like soda blasting or wire brushing for severe structural cases
Step 6: Drying and source fix
A crucial step is addressing the underlying moisture source that supported the infestation in the first place. Stopping the leak or condensation is the only way to guarantee a permanent fix.
We implement a moisture control strategy that might involve setting up commercial dehumidifiers or installing vapor barriers. Fixing the problem could also require a simple plumbing repair or improved attic ventilation.
Failure to dry the structure properly means the fungus will return within weeks.
We never treat the source fix as an optional upsell. A reputable contractor considers this moisture correction a mandatory part of the job.
The biology is simple. Our team knows that no water means no microbial growth.
Step 7: Verification
True peace of mind comes from independent verification. The AMRT specialist checks every surface to ensure no dust or visible stains remain.
We conduct a final visual inspection to verify that all work meets the rigorous S520 guidelines. An independent lab analysis usually costs between $400 and $700 in the US. This objective test proves the indoor air quality has returned to safe levels.
Our teams strongly recommend bringing in a third-party industrial hygienist for clearance air testing.
Taking down the plastic too early risks re-contaminating the property. The home is finally ready to be put back together once clearance is granted. We only dismantle the containment barriers after receiving a passing grade from the laboratory.
Step 8: Reconstruction
Finding separate contractors for mitigation and repairs can cause massive scheduling headaches. Using a single team saves time and stress. We transition smoothly into rebuilding the removed drywall, insulation, and finishes.
A unified approach means keeping the exact same project manager. Property owners enjoy clear, unified documentation for their insurance claims.
Our in-house reconstruction team handles these professional mold remediation projects from start to finish.
Excellent craftsmanship hides the fact that a disaster ever happened. Flawless finish work is the hallmark of a great restoration. We ensure the rebuild phase restores your property to its original condition before the water damage occurred.
Why each step matters
Microscopic spores spread rapidly and persist in the environment for years if not handled correctly. Hidden colonies are incredibly common inside wall cavities and beneath flooring. We follow this exact blueprint because fungal infestations present unique biological challenges.
- Spores spread easily and persistently without containment
- Hidden growth occurs rapidly behind walls
- Recurrence happens without proper source fixes
- Health risks require specialized protective equipment
Skipping a step downgrades a professional mitigation into a risky amateur cleanup. The industry established these rules because thousands of failed jobs proved what happens when contractors take shortcuts.
We also know that securing insurance coverage relies heavily on documented procedures. Careful verification ensures the house is truly safe. You deserve nothing less than a complete and permanent recovery.
Our final piece of advice is to always demand compliance with these mold remediation steps before signing a contract. A quick phone call to a certified evaluation team sets your recovery in motion. Do not hesitate to reach out today for immediate assistance with your property.
Frequently Asked Questions
Why follow IICRC S520 instead of just cleaning?
How long does mold remediation take?
Do I need to leave during remediation?
Related Guides
Attic Mold Removal in the Pacific Northwest
Why PNW attics get mold and what proper remediation looks like — ventilation, sheathing, and root-cause fixes.
Basement and Crawl Space Mold Removal
Below-grade mold in PNW homes — sources, removal process, and why source fix matters.
Does Homeowners Insurance Cover Mold Remediation?
Mold coverage depends on the cause. Covered events vs. excluded gradual issues, mold riders, and how to document a claim.
Is Black Mold Dangerous? Health Risks Explained
Stachybotrys (so-called black mold) and the real health risks — what's myth, what's evidence-based, and when to call professional remediation.
Learn more about Mold Remediation
Talk to a real local dispatcher 24/7. Certified technicians on-site in 60 minutes — direct insurance billing.