Crawl space encapsulation explained: What it actually is
We see this fallout daily at Seattle Water Damage Restoration. Getting crawl space encapsulation explained clearly is crucial when you face sudden flooding. Dirt crawl spaces quickly become breeding grounds for mold after an emergency.
Our complete encapsulation systems seal the space from soil and outside air. Active dehumidification then conditions the zone to prevent future contamination.
We want to clarify what is encapsulation in practical terms for 2026.
This guide will walk through the materials, the timelines, and the real-world benefits for your property. You will understand exactly what to expect from this process.
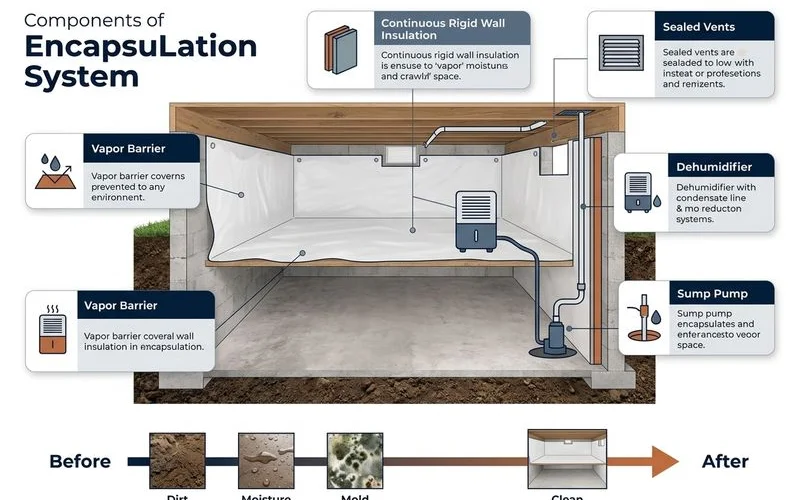
The components
A true moisture control system requires several interlocking parts to function correctly. We install each piece methodically to guarantee maximum protection against rising damp.
Cutting corners on any single component ruins the effectiveness of the whole barrier. Let us review the primary materials required for a complete job.
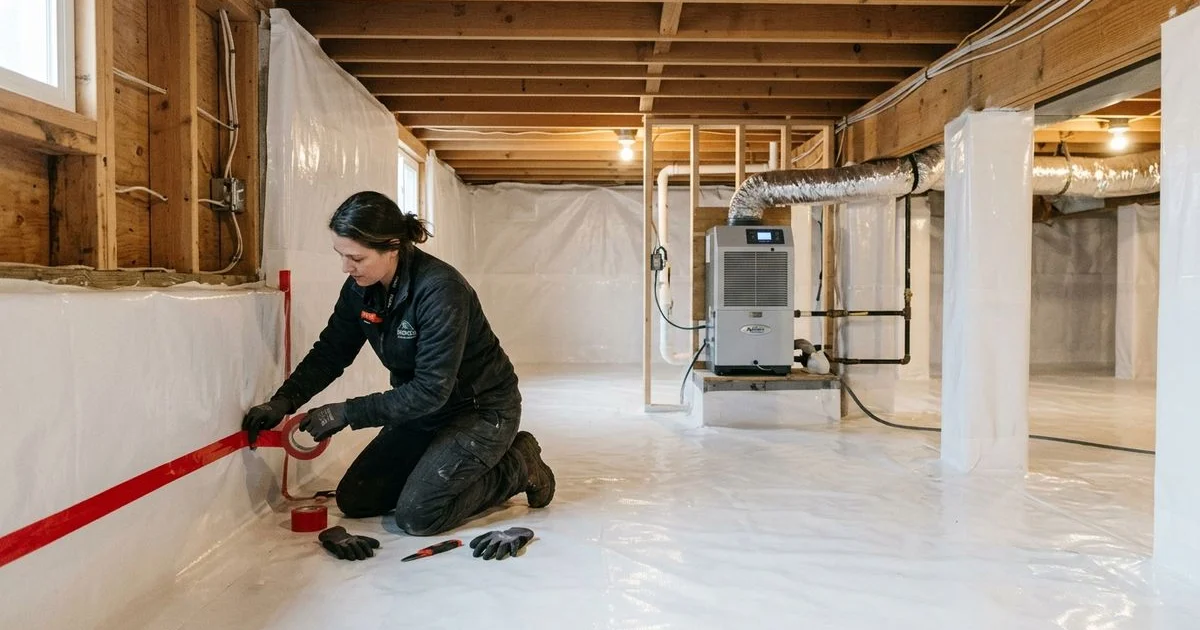
Vapor barrier on floor
Our technicians typically install 15-mil to 20-mil liners, like the industry-standard StegoCrawl Wrap. Heavy-duty reinforced plastic blocks soil moisture, ground air, and radon migration. Standard 6-mil plastic tears instantly under the boots of plumbers or emergency extraction crews.
We overlap the joints by a full six inches and secure them with waterproof seam tape. Proper vapor barrier installation requires strict attention to detail. The material edges run right up the foundation walls for complete coverage.
Mechanical fasteners and butyl tape seal these top edges to meet strict ASTM E96 standards. Our application achieves a Class 1 rating, meaning the barrier allows 0.1 perms or less of moisture transmission.
Wall treatment
Crawl space foundation walls require tight sealing where they meet the heavy-duty floor barrier. Rigid foam board insulation often covers these walls in colder climates.
We attach the liner securely to the concrete block or poured walls. The preferred specification for Pacific Northwest homes is R-10 closed-cell foam board. This material resists flood damage much better than traditional fiberglass batts.
Our crews always leave a three-inch inspection gap at the top of the wall. Pest control companies need this clear space to check for termite activity. Local building inspectors also look for this gap during routine compliance checks.
Vent treatment
We completely seal shut all traditional crawl space vents during modern encapsulation. Bringing warm, humid outside air into a cool foundation creates instant condensation on floor joists. The 2024 International Residential Code, specifically Section R408.3, permits these unvented spaces safely.
Our methods strictly follow this code by pairing a continuous vapor retarder with active conditioning. You must stop humid outside air from entering the foundation to prevent wood rot. Local permit compliance ensures your setup meets all current safety standards.
We coordinate specific provisions for combustion air if your jurisdiction requires them.
Dehumidification
A dedicated crawl space dehumidifier pulls remaining moisture from the air to maintain safe levels. The Environmental Protection Agency suggests keeping general indoor humidity between 30 and 50 percent.
Our team recommends powerful 2026 models like the Santa Fe Compact70 or the AprilAire E070. Sealing alone just traps existing water, making active drying the step that actually saves your home. This precise moisture control prevents wood joists from splitting while remaining too dry for mold.
We target a highly specific 45 to 55 percent relative humidity range for sealed basements. Commercial-grade units must be sized based on the total cubic footage of your property. Built-in drains route condensation directly to a sump pump or external discharge pipe.
Source fixes
Our technicians inspect the entire area for hidden plumbing leaks or exterior grading issues first. You must address any active moisture sources before placing a new liner. Trapping standing water under plastic causes massive structural failure down the road.
We focus on these critical repairs before rolling out any material:
- Repairing burst pipes and sealing leaking joints.
- Upgrading to reliable cast-iron sump pumps like the Zoeller M53.
- Correcting exterior grading so soil slopes away from the foundation.
- Extending gutter downspouts at least five feet from the home.
- Sealing foundation wall cracks with high-grade waterproof patches.
Ignoring these primary water sources turns an expensive upgrade into a nightmare. A proactive approach fixes the root cause immediately. Our process ensures your encapsulation system functions flawlessly for years.
The process
A typical crawl space cleanup and encapsulation project runs about three to seven days. Professional installations require strict staging to ensure no moisture remains.
We adjust this timeline based on the size of the home and the severity of the water damage. Your property demands a highly structured daily schedule to guarantee success. The timeline below highlights the critical steps involved.
| Project Day | Key Actions & Technical Steps |
|---|---|
| Day 1: Demolition & Cleanup | Removal of ruined insulation and contaminated debris. HEPA vacuuming of joists to meet IICRC S500 guidelines. |
| Day 2: Sanitization & Drying | Antimicrobial application on all exposed wood. Industrial LGR (Low Grain Refrigerant) dehumidifiers extract deep moisture. |
| Day 3-4: System Installation | Rolling out the heavy-duty vapor barrier and taping seams. Permanent dehumidifier installation and target humidity configuration. |
| Day 5: Verification & Review | Final moisture readings taken with digital hygrometers. Complete walkthrough and project documentation provided. |
Our specialists add extra days for installing perimeter French drains or conducting major foundation repairs. Extensive source fixes naturally extend this timeline. This careful pacing guarantees a permanent defense against future flooding.
What it costs
We evaluate several factors to provide an exact quote for your property. The national average for a standard encapsulation in 2026 sits right around $5,500. Material prices and local labor rates dictate the final project cost.
Our pricing structure breaks down into three distinct project categories:
- Small or Simple (Under 800 sq ft): $5,000 to $8,000 for minimal prep and standard liners.
- Standard (800 to 1,500 sq ft): $8,000 to $15,000 for moderate debris removal and vent sealing.
- Complex (Large area or extensive fixes): $15,000 to $30,000+ when trenching or sump pumps are required.
High-quality materials drive a significant portion of this budget. Crawl space labor remains slow and demanding work in confined conditions.
We invest in heavy-duty polyethylene liners that resist punctures and last for decades. Premium commercial dehumidifiers retail between $1,500 and $3,000 alone.
This investment costs roughly the same as a mid-range bathroom remodel. Our installations protect the entire home for fifteen to twenty years.
The benefits
A properly executed encapsulation project dramatically changes how your home feels and functions. The stack effect constantly pulls crawl space air up into your living rooms.
We see immediate improvements in air quality within the first forty-eight hours. Moisture control blocks harsh odors and dangerous mold spores from rising. The differences become obvious very quickly.
| Without Encapsulation | With Proper Encapsulation |
|---|---|
| High indoor humidity and musty smells upstairs. | Lower humidity levels and fresh indoor air. |
| Heavy allergen loads from mold and dust mites. | Dust mites die off rapidly when humidity drops below 50 percent. |
| Cold floors and higher winter heating bills. | Warmer floors and up to a 15 percent reduction in heating costs. |
| Wood rot and degrading fiberglass insulation. | Protected structural joists and completely dry foundation materials. |
Our targeted moisture control systems provide unmatched peace of mind during heavy storm seasons. These structural protections appeal strongly to future home buyers. Real estate agents consistently praise the value of a clean, dry basement.
We know that Pacific Northwest climates destroy traditional dirt floors very quickly. Protecting your foundation now prevents catastrophic structural damage later. The investment pays off in both comfort and property value.
Who needs it
Our technicians find rotting plastic sheeting in 90 percent of the standard inspections we perform. Certain properties benefit significantly more from moisture barriers than others. Houses constructed before 1990 rarely meet modern building code requirements for damp-proofing.
We strongly recommend this upgrade for any homeowner experiencing active water intrusion. The following scenarios make this system absolutely essential:
- Homes with heavily soil-exposed floors.
- Properties recovering from a flooded basement or major pipe leak.
- Families dealing with severe respiratory allergies or asthma.
- Any property showing visible mold on the floor joists.
- Houses currently on the real estate market with pending inspection concerns.
A dry climate with a sealed concrete floor might not require this level of intervention. The classic dirt floor configuration remains a major liability for most regional properties.
Our installation process guarantees your home stays dry, safe, and structurally sound for the future.
Conclusion: Crawl space encapsulation explained
Fast action is required when you discover water damage under your house. Delaying repairs allows mold to spread rapidly through the floor joists.
We encourage you to schedule a professional evaluation immediately. A trained specialist will measure your humidity levels and assess the structural risks. Protecting your foundation today prevents expensive emergencies tomorrow.
Frequently Asked Questions
What's the difference between vapor barrier and encapsulation?
How long does encapsulation last?
Do I need to fix the moisture source before encapsulation?
Related Guides
Crawl Space Drying vs. Encapsulation: Which Do I Need?
Mitigation drying after a water event vs. permanent encapsulation — when each makes sense and how they relate.
Crawl Space Stack Effect & Your Indoor Air Quality
Stack effect means about half the air upstairs comes from the crawl space. Why that matters for PNW homes.
Water in Your Crawl Space: What to Do
Standing water in your crawl space is a structural and air-quality risk. Causes, immediate steps, and the cleanup process.
Learn more about Crawl Space Cleanup & Encapsulation
Talk to a real local dispatcher 24/7. Certified technicians on-site in 60 minutes — direct insurance billing.