We at Seattle Water Damage Restoration see the immediate panic that water damage causes when responding to flooded basements and burst pipes across the US. The first question homeowners usually ask is how to find the hidden source before tearing down the drywall.
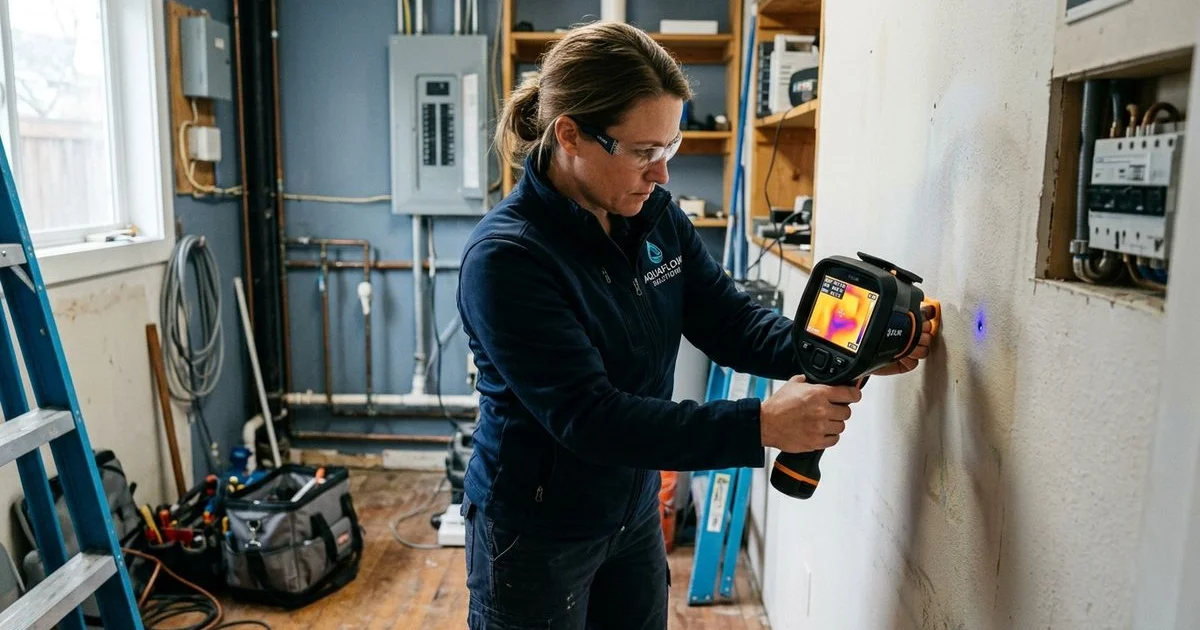
Our team relies heavily on infrared camera water leak detection to locate these invisible issues.
This technology fundamentally changes how properties are assessed during an emergency. We will explain the physics behind this method, detail what thermal tools can actually see, and walk through the exact steps for confirming a hidden leak.
Every property owner needs to understand these basics before authorizing demolition.
The basic physics
We use infrared thermography to measure surface temperature. Different materials at different temperatures emit varying amounts of infrared radiation.
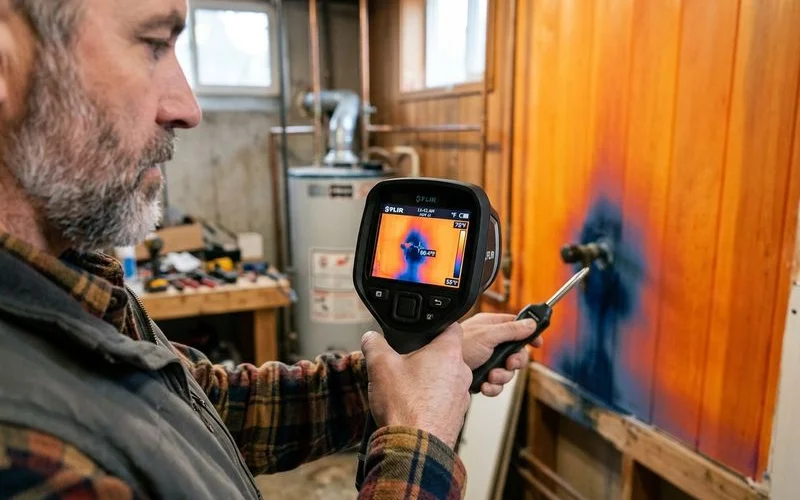
Our primary tool, the FLIR camera, translates this energy into a color-coded map. Cool areas appear in different colors from warm areas.
“Water leak detection relies on evaporative cooling. As water molecules transition from liquid to gas, they pull heat from the surrounding drywall, creating a cold spot the camera detects.”
We look for the specific thermal reaction of evaporative cooling to find water. Wet materials lose heat as moisture evaporates from them, making them slightly colder than identical dry materials nearby.
Our technicians rely on high-end thermal cameras that detect temperature variations as small as 0.1°C across a wall surface. This extreme sensitivity allows the device to see the wet portion as a distinct cooler zone.
We train homeowners to recognize these common visual patterns on the screen:
- Moisture plumes: A hidden leak typically manifests as an irregular “bloom” or “plume” shape.
- Structural lines: A dry structural stud will appear as a sharp, straight vertical line.
- Surface proxies: The camera sees only surface temperature, which acts as a reliable proxy for the hidden conditions.
What thermal imaging can see
We identify several specific issues using thermal imaging leaks technology. The camera reveals patterns that point directly to the source of the problem.
Active leaks:
- Water from supply lines shows as a sustained cool zone, often running vertically from the source.
- Drain leaks present as intermittent cool zones that appear only after water usage.
- Roof leaks create cool zones moving down from the ceiling, as wet attic insulation cools faster than dry insulation.
- Window or door leaks show cool zones around the perimeter.
- Hidden plumbing leaks behind walls or in floors become visible.
- Radiant heating pipe failures alter the bright heat pattern into an irregular shape.
Recent saturation:
- Materials that were recently wet still show as cooler from residual moisture.
- This residual signature proves highly useful for confirming past leak paths during an investigation.
Insulation gaps:
- Cold spots in walls often indicate where insulation is missing or compressed by builders.
- This serves as a helpful supplementary use beyond leak detection.
What thermal imaging can’t see
Our equipment has incredible capabilities, but it is not magic. Certain conditions prevent even the best cameras from detecting moisture.
Completely dried materials:
- A leak that occurred months ago and has since dried will not show up.
- The camera cannot detect a history of damage for dormant problems.
Very small leaks:
- Tiny drips with minimal evaporation may not produce a detectable temperature difference.
- The moisture must evaporate fast enough to create at least a 0.1°C drop.
Water inside pipes:
- Active leaks show up clearly on the screen.
- Intact plumbing does not reveal the contained water.
Through deep materials:
- Concrete or thick masonry may not transmit enough temperature differential.
- The underlying water often stays hidden beneath dense basement slabs.
Heat-equalized environments:
- Objects need time to settle into stable readings after a sudden indoor temperature change.
- A freshly air-conditioned room might mask the subtle cooling effect of evaporation.
False positives to watch for
We regularly encounter cold spots that mimic water damage. Infrared cameras translate temperature data into an “Iron” or “Rainbow” color palette.
Our experience shows that any cold area will show up as a dark blue or purple zone, regardless of the cause. The camera identifies candidates, but it can show cool zones that are not actually leaks:
- Cold air gaps behind walls look remarkably similar to wet drywall.
- Plumbing chase shadows occur when HVAC ducts run cold air through a wall cavity.
- Window or framing shadows happen when cold winter air bypasses the insulation.
- Recently-active showers or appliances create temporary cool zones on nearby surfaces.
We must verify every thermal anomaly to prevent costly mistakes. A cold spot from an air leak requires a simple weatherstripping fix, while a true plumbing leak requires immediate water extraction.
The combined approach to infrared camera water leak detection
We pair a flir camera leak detection scan with physical moisture meters. Professional leak detection requires multiple tools working together to eliminate false positives.
Our field operations prove that the combined approach has very high reliability. Single-tool inspections are much less reliable and often lead to destructive exploratory demolition.
The 5-Step Verification Process
- Initial visual inspection: We look at the symptoms and likely areas first.
- Thermal imaging scan: A technician identifies candidate areas with distinct thermal signatures.
- Moisture meter verification: A pin-style or pinless meter confirms the actual moisture content in the building material.
- Documentation: We provide annotated photos and meter readings to document the finding.
- Source identification: The team tracks the water back to its origin point.
Our toolkit includes advanced models like the FLIR MR277 building inspection system. This specific device combines a built-in thermal imager with a moisture hygrometer.
Comparing Detection Methods
| Feature | Thermal Imaging Camera | Digital Moisture Meter |
|---|---|---|
| Primary Function | Scans large areas quickly for temperature changes | Measures exact moisture content in a specific spot |
| Detection Style | Non-invasive surface scanning | Pinless (surface) or Pin-style (penetrating) |
| Best Used For | Finding hidden leak paths and anomalies | Confirming if a cold spot is actually wet |
| Limitation | Cannot prove the presence of water alone | Requires slow, point-by-point testing across a wall |
We use both tools to prevent unnecessary wall damage and accurately map the full scope of the emergency. This dual-method strategy protects the property owner from bad repair estimates.
When to consider it
We highly recommend getting a professional thermal inspection if you suspect hidden moisture. The average cost of residential water damage restoration in the US ranges from $1,000 to over $10,000 in 2026.
Our clients save thousands of dollars in structural repairs by catching a problem early. Waiting for a small drip to become a major flood is a common, expensive mistake.
Call an expert if you experience:
- Recurring ceiling stains you cannot explain.
- A musty smell with no visible source.
- Unexplained water bill increases.
- Damage that may be from a hidden plumbing leak.
- Pre-purchase inspection needs, especially for older homes with aging pipes.
- An insurance claim requiring a documented leak source.
We typically spend 1 to 3 hours completing the inspection for a standard residential home. You will receive a written report with annotated photos within a few business days.
Our standard inspection cost is typically $400 to $800 for residential properties. This upfront expense is significantly cheaper than the exploratory demolition the inspection prevents.
Conclusion
We want you to feel confident when managing a property crisis. Contact a local restoration professional immediately if you suspect an active leak behind your walls.
Our team is always ready to help you manage the recovery process. Protect your property today by scheduling a comprehensive infrared camera water leak detection scan.
Frequently Asked Questions
How does thermal imaging detect water?
Can thermal cameras see through walls?
Will thermal imaging find any leak?
Related Guides
Learn more about Thermal Imaging Leak Detection
Talk to a real local dispatcher 24/7. Certified technicians on-site in 60 minutes — direct insurance billing.